
Before data collection can begin you will need to load a project onto the Sapelli app. You can either use an existing project to participate in a current initiative, or you can design your own project that specifically meets the requirements of your users and yourself. Either way, you will need to load the Sapelli project (.sapelli or .sap) file using the menu icon in the top left hand corner.

When you click on the menu icon, any previously installed projects will appear as well as the option to add new projects. Since you’ve only just installed the app, your list should be empty!
Let’s do something about that by adding a simple demo project to the app. The example project collects data on the mode of transport the user most recently used. You can download the Transport demo project: Transport Demo v2.3. If using a computer, transfer the project to your Android device using the same steps listed on the Download and install Sapelli page for the APK file.
![]() Alternatively, you can download the project directly onto your phone and load it by scanning this QR code. (Note you will need to have downloaded an app which can read QR codes to do so, such as Barcode Scanner which is compatible with Sapelli).
Alternatively, you can download the project directly onto your phone and load it by scanning this QR code. (Note you will need to have downloaded an app which can read QR codes to do so, such as Barcode Scanner which is compatible with Sapelli).
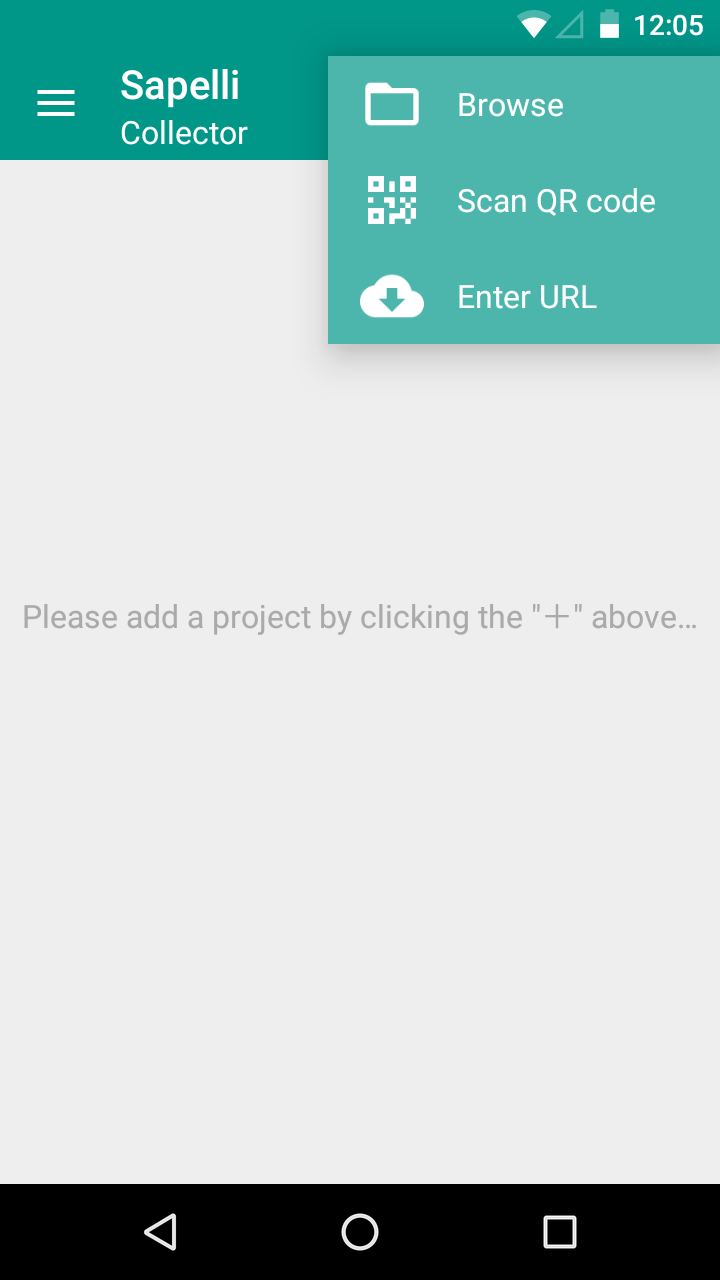 Open the Sapelli app and tap on the (+) icon and then click “Browse”.
Select the project you just downloaded or transferred (if you downloaded the file using your Android device, check the “Downloads” folder). After selecting the project, you will be taken back to the main screen and the project will have been added to the list of available projects.
NB: You can also use QR code or enter a URL to find a Sapelli project.
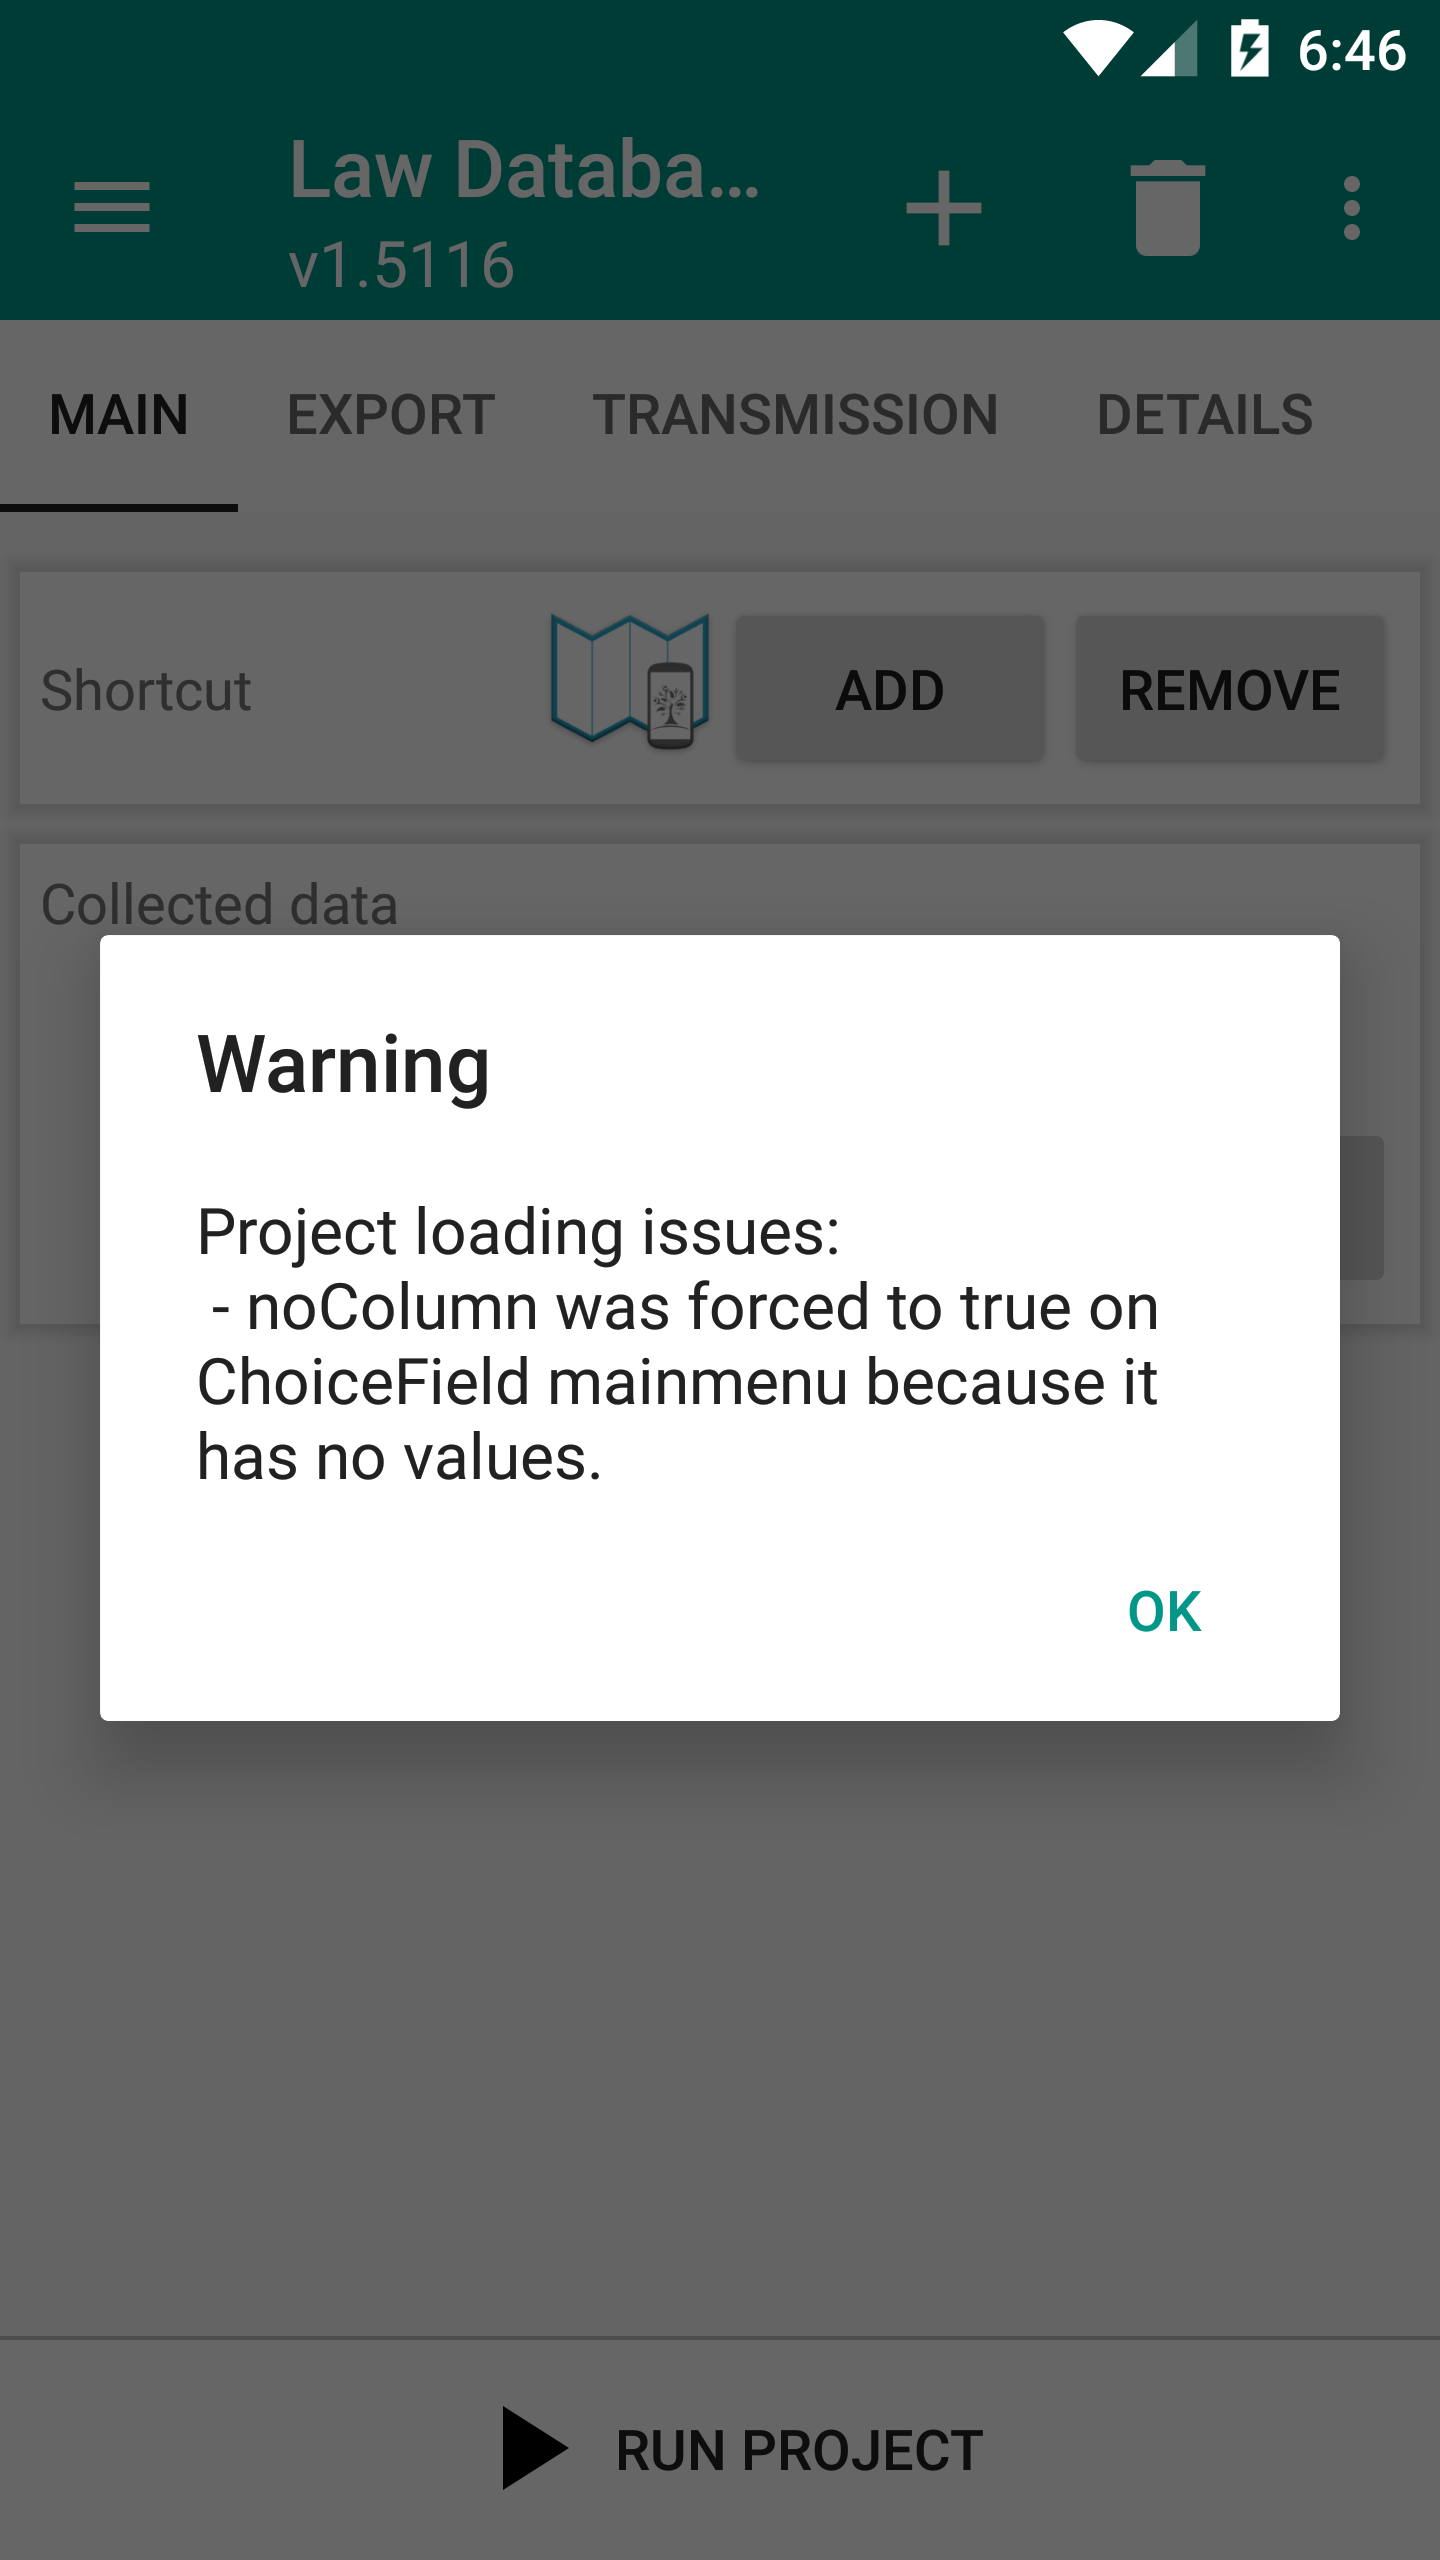 When adding a new project, if there are any problems with the project a warning or error box will appear. If the message is a ‘Warning’ the project will still load. However, Sapelli is warning you about something in the project that you may want to be aware of.
In the example on the left the warning message has appeared to remind the user that the ‘noColumn’ attribute was not set to ‘true’, but no Value was specified either. Therefore, it is warning the user that no data will be saved. To read more about the noColumn attribute see the Choice field’s attributes.
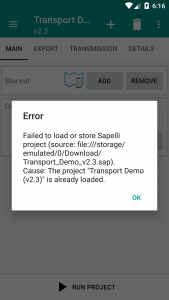 However, if an ‘Error’ message appears the project will not load. In this image the project has failed to load because the same project has already been loaded onto the app. Error’s may also be due to a mistake within the PROJECT.xml file.
Both warning and error messages can be a valuable tool for project designers who want to check the specifics of the project they have created.

Load the Transport demo project from the list of available projects and click “Run project” at the bottom of the screen.
If you want to have direct access to a project from your phone’s home screen you can use the “Shortcut” option. Simply load the project you want quick access to and click “Add” in the Shortcut option. Finally, if you want to remove the shortcut, just click “Remove” on the same screen.