
In the scenario that a user has collected data in the field, but has no internet connection, they can export their collected data to their own phone. Note that through the export function only the names of media files (photos, audio/video files) are exported, but not the actual files themselves. In order to transfer the actual media files onto a computer, the user will need to back up their media files. At any stage they can then transfer the data to a computer.
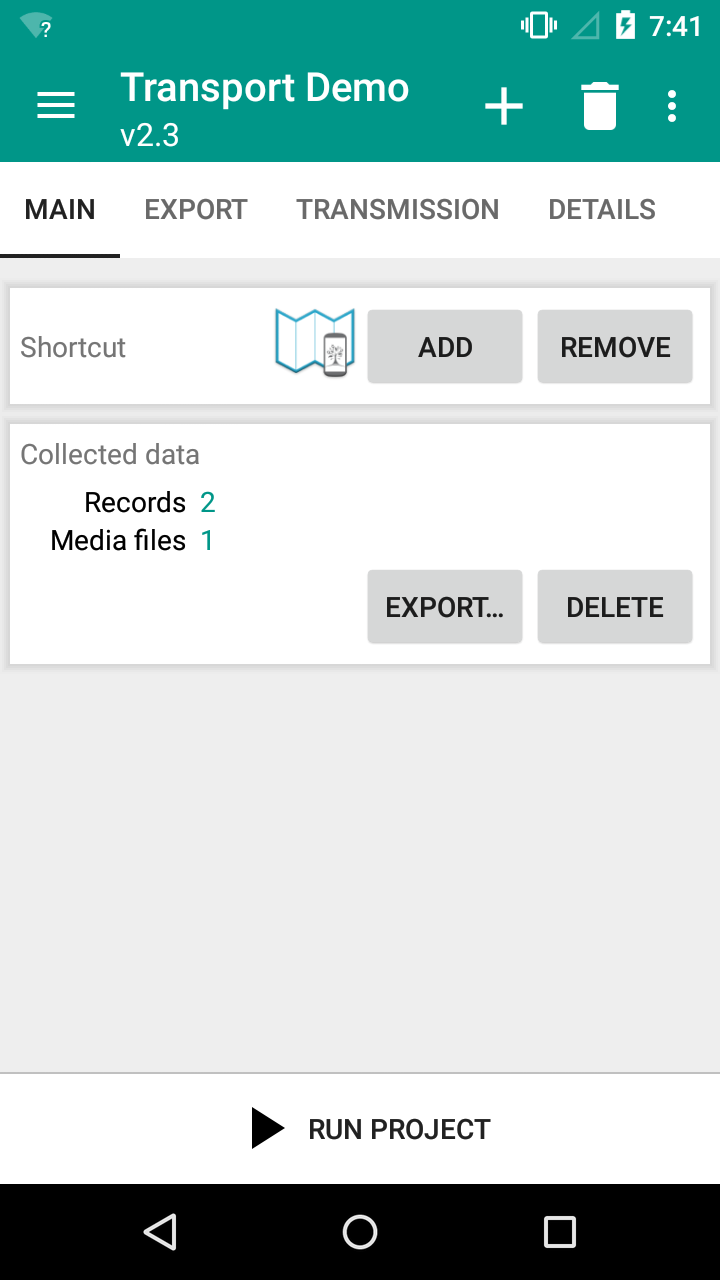
The user can see how much recorded data and media files they have collected under “Collected data” in the home page of the project, as seen in the image on the left. To export this data to the phone, simply click the “Export” button on the home page.
XML export
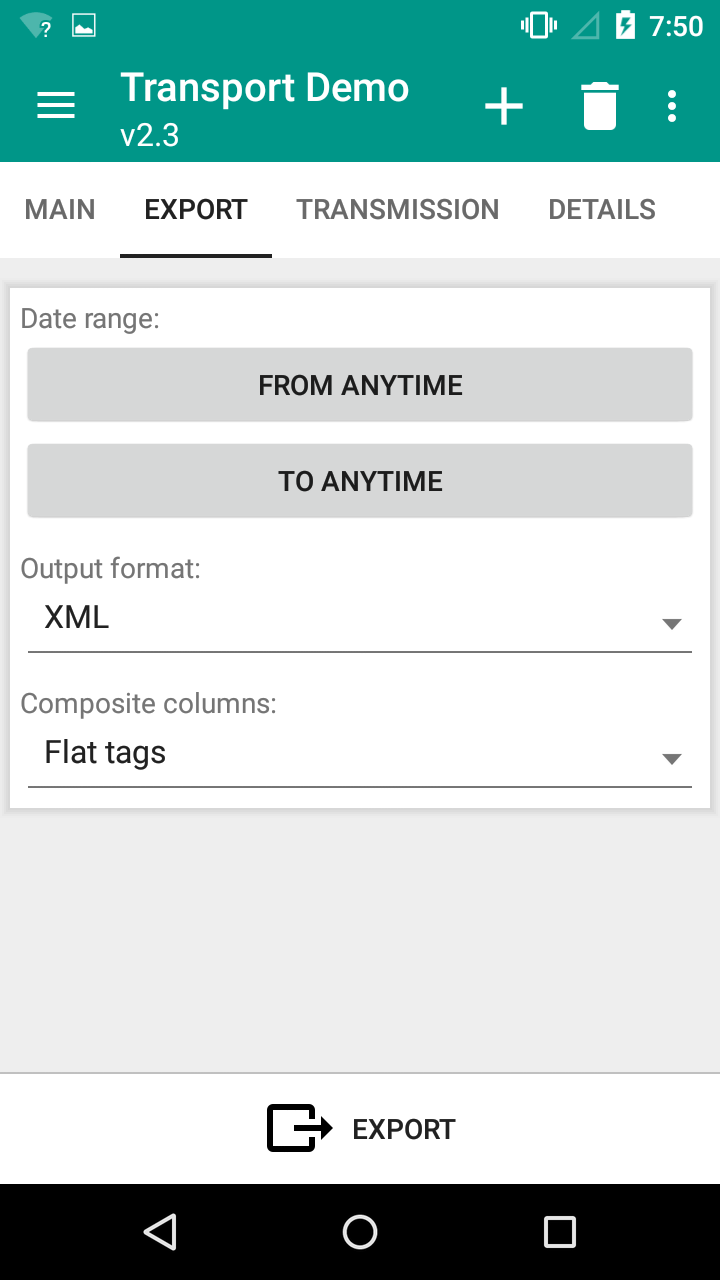
 Here the user has the option to set a date range for when collected data is exported to the phone.
Next the user can decide in what format they wish their data to be exported. One option is for the data to be exported as an XML file. If the user chooses “XML” as the ‘Output format’ they can also select how the data should be displayed, where “Flat tags” is the default option. Data can also be displayed as a “Single string” or “Grouped tags” in the XML file.
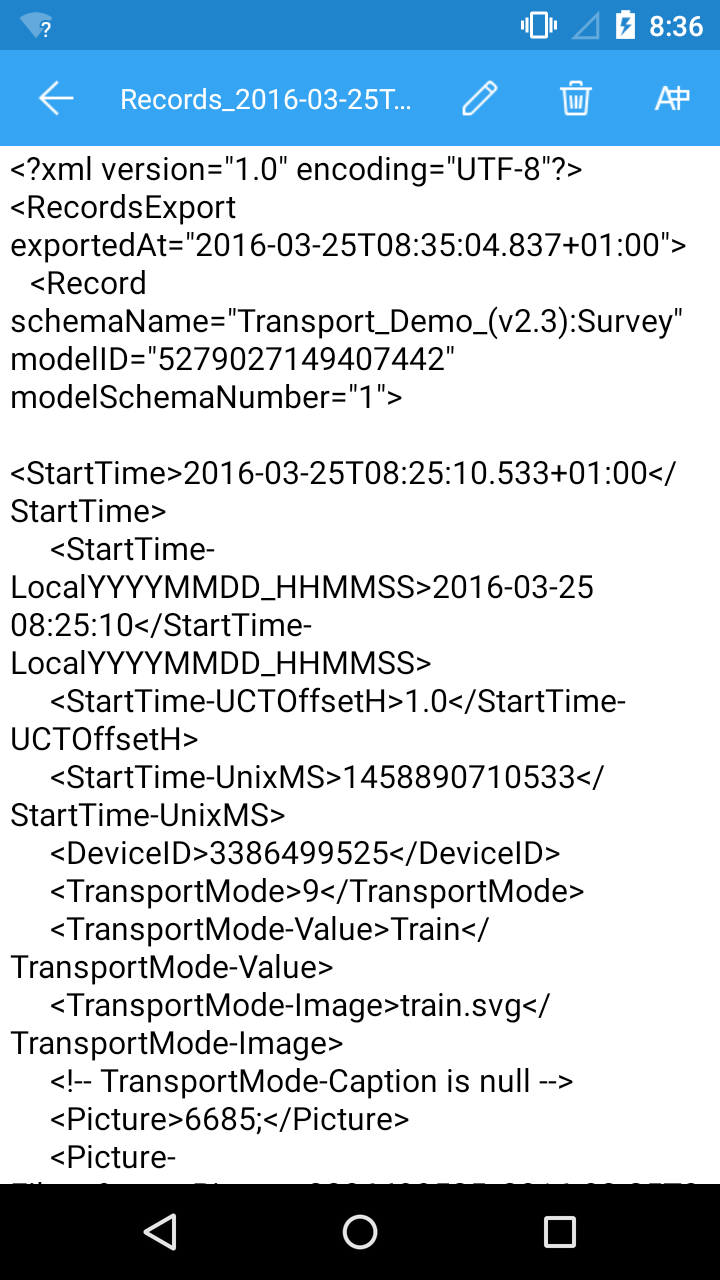
Finally, the user can click the “Export” button and the data will be sent to the phone’s Downloads folder. At this stage the data will look similar to the image on the right. To see the data as an XML file, the user will need to transfer the data to a computer.
CSV export
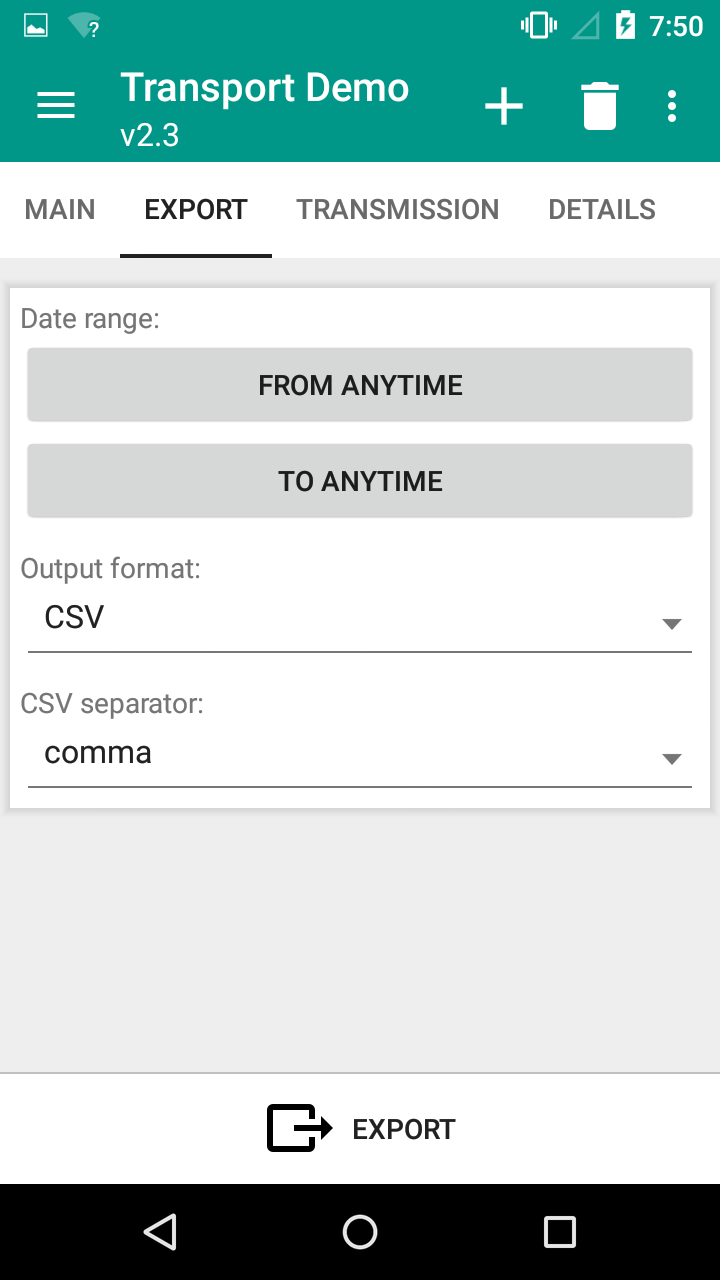
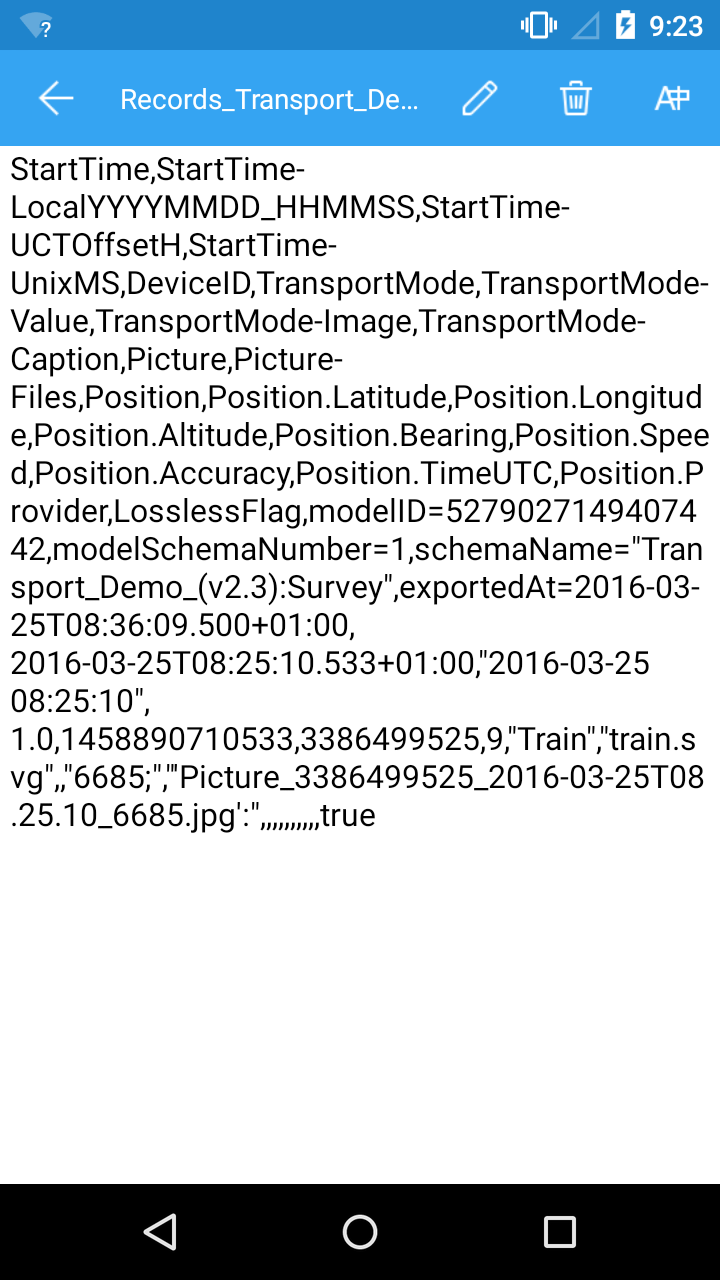 Alternatively, if the user would rather the data be displayed within a table, then the ‘Output format’ should be set to “CSV” rather than XML.
CSV stands for “comma-separated values”. The user is given the option to change how the data values are separated, where “comma” is the default option. Data can also be separated with a “semicolon” or “tab”.
Finally, the user can click the “Export” button and the data will be sent to the phone’s Downloads folder. At this stage the data will look similar to the image on the right. To see the data within a table, the user will need to transfer the data to a computer.
Delete records
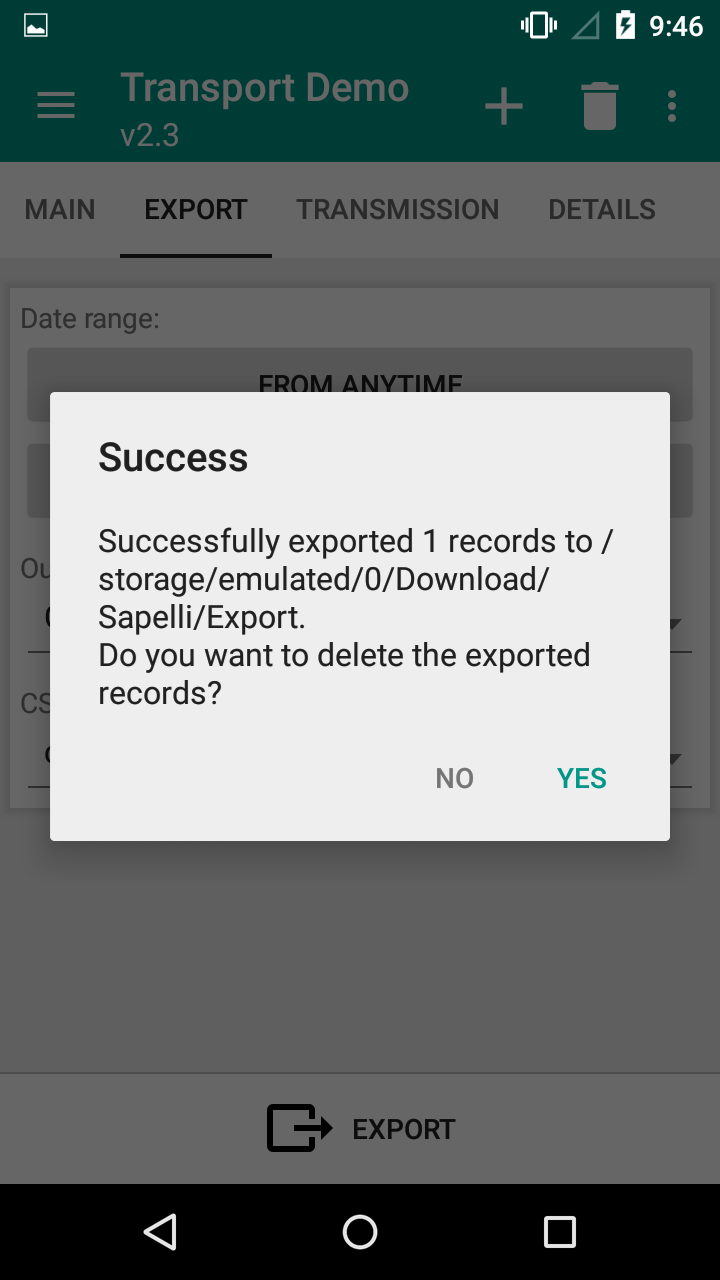
Upon exporting, Sapelli will ask the user if they wish to delete the exported records from the application.
Back up your media files
When exporting data to your phone, media files are not included – only the values of the media files. Therefore, if you wish to transfer and save media files onto a computer follow these steps:
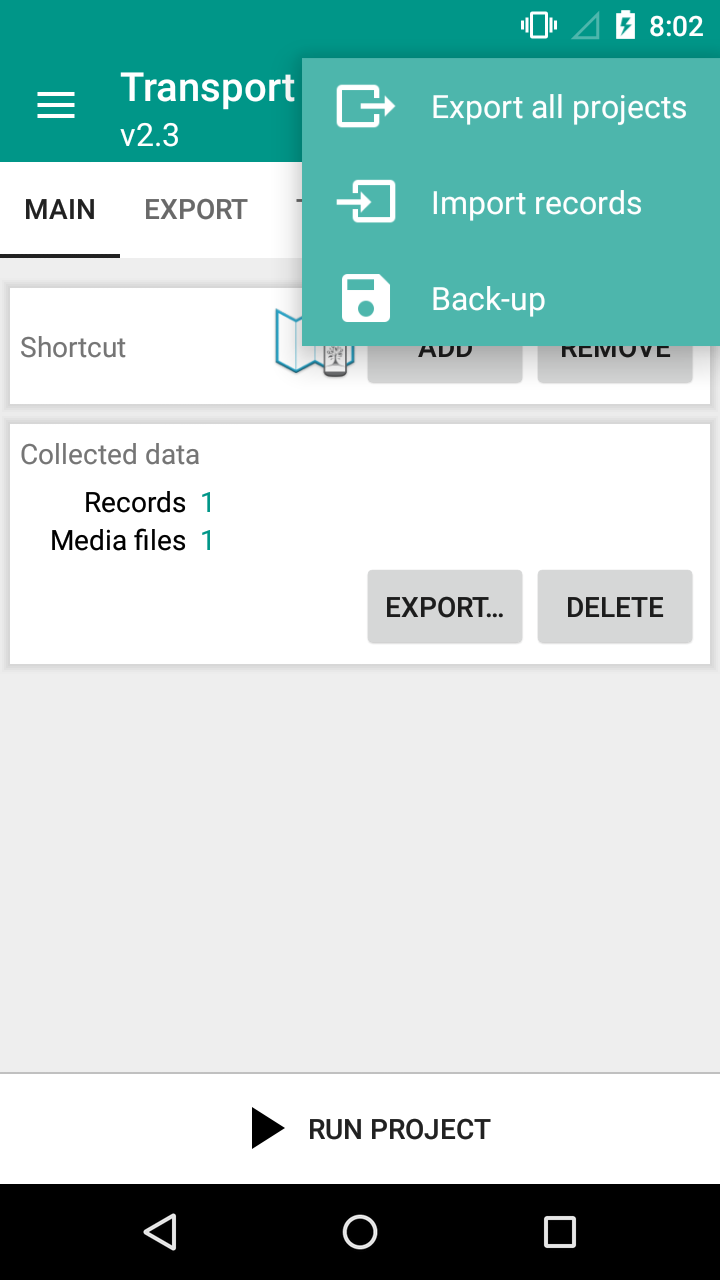 On the home page of the app click the ‘three dot’ menu icon in the top right hand corner. Next click the “In- & export” option and then the “Back-up” option.

To back up media files check the “Attachments” box. This will include any photo, audio or video files collected. The “Exported data” option is to obtain a spreadsheet with all the values of the data. The “Log files” option will provide the analytics of where the user clicked whilst using the app. The “Project files” option is to obtain the .sap file. Once you have checked the boxes’ relevant to you, click “OK”.
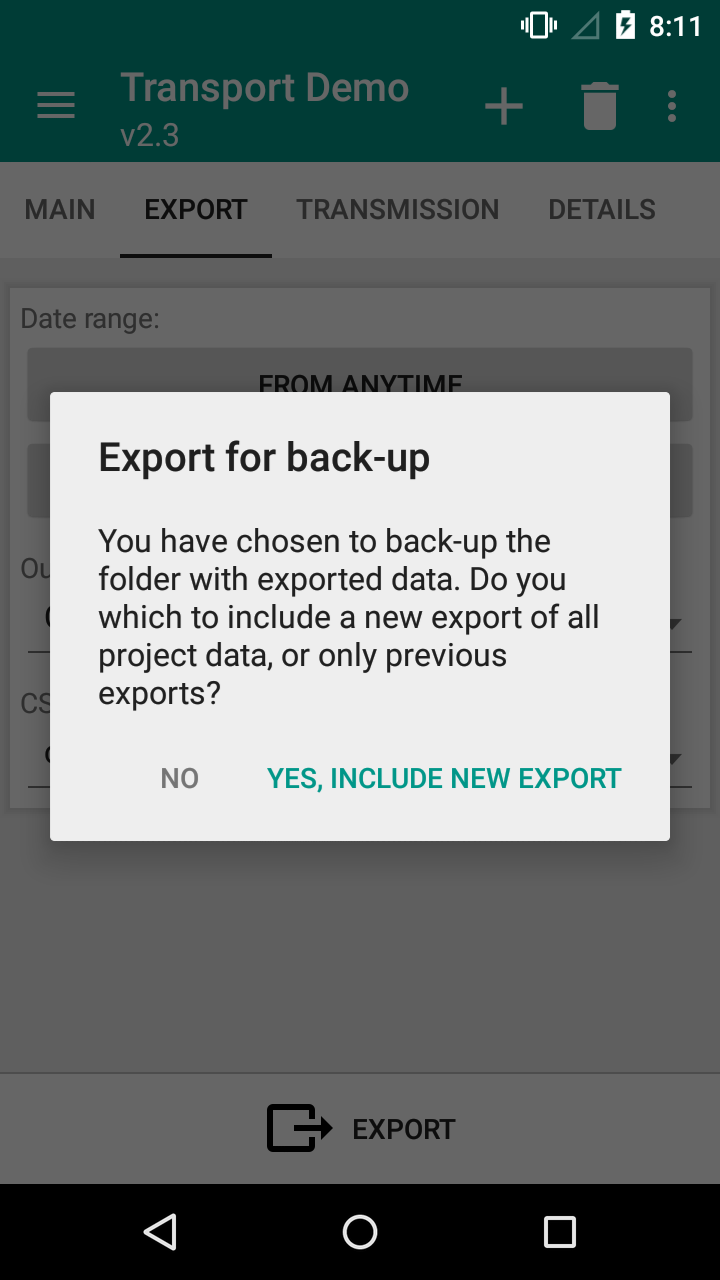
A box will appear asking whether you would like to include a new export. The “No” option will mean that only files that have already been exported to the phone will be backed up. The option “Yes, include new export” will mean that any new data that has been collected since the last time the user exported data to their phone will also be backed up.
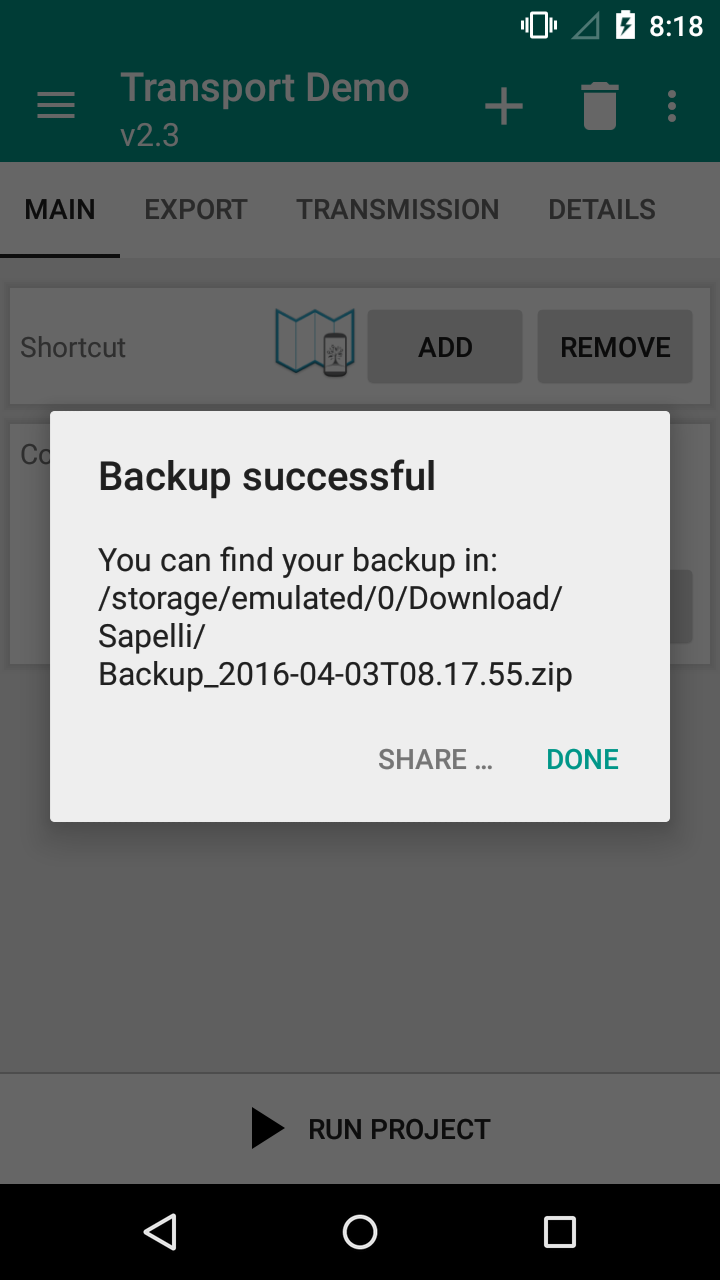
Finally, a message will appear if the Back up has been successful. The files can be found within the Downloads folder (Go to Download -> Sapelli -> Export) and transferred to the computer, as described above.
Transferring data to a computer
Once the data has been exported to the user’s phone, they can then transfer the data to a computer. The user can either connect the phone to a computer using a USB cable or using the phone’s SD card. The data will be within the Downloads folder (Go to Download -> Sapelli -> Export). Alternatively, the user can email the data from their phone and open the email on a computer. The data file(s) can then be saved onto the computer.
The data will either be displayed as an XML file in an application that can read XML, such as Internet Explorer or Notepad++, if the Output format was set to XML. Alternatively, the data will be displayed within a table in an application that can read CSV files, such as Microsoft Excel, if the Output format was set to CSV. To understand how to interpret the data within these files, click here.